Git Remotes
Overview
Teaching: 30 min
Exercises: 0 minQuestions
How do I share my changes with others on the web?
Objectives
Explain what remote repositories are and why they are useful.
Push to or pull from a remote repository.
Version control really comes into its own when we begin to collaborate with other people. We already have most of the machinery we need to do this; the only thing missing is to copy changes from one repository to another.
Systems like Git allow us to move work between any two repositories. In practice, though, it’s easiest to use one copy as a central hub, and to keep it on a server on the internet rather than on someone’s laptop or workstation. Such a centralized copy of a Git repository is referred to as a remote repository.
Remote repositories can exist in any location that is accessible over a network. They can live on a general file server such as Engram or on a website. Alternatively, a remote repository could live on a web server on the moon (so long as your interplanetary internet is set up correctly; make sure that your PC is able to speak Licklider Transmission Protocol and CFDP before attempting this). In general, most programmers find that using third-party hosting services like GitHub, Bitbucket or GitLab is the most practical way hold those master copies. Since we are working with GitHub Desktop in these examples, we will proceed with GitHub. A more thorough treatment of the advantages and disadvantages of various hosting providers will be given later on in the Hosting section.
Multiple Remotes
While it’s standard practice to have only one central copy, it’s also possible to send copies of your Git repository from your workstation to multiple servers or websites. For instance, you could send changes to copies of your repository in both GitHub and GitLab. This can be useful if you want a backup copy of your central repository to be available if the server hosting your remote repository is offline or otherwise inaccessible (e.g., GitHub may go down, but GitLab would still be available).
Each remote in a Git repository has its own unique local name. By convention, the main centralized copy is called
origin. Remember that the name a remote has only exists locally. It’s an alias that you can choose - whetherorigin, orupstream, orfred- and not something intrinsic to the remote repository.For the purposes of this tutorial, we will only be dealing with one remote repository.
Let’s start by switching back to the GitHub Desktop application. Your window should look something like the following:
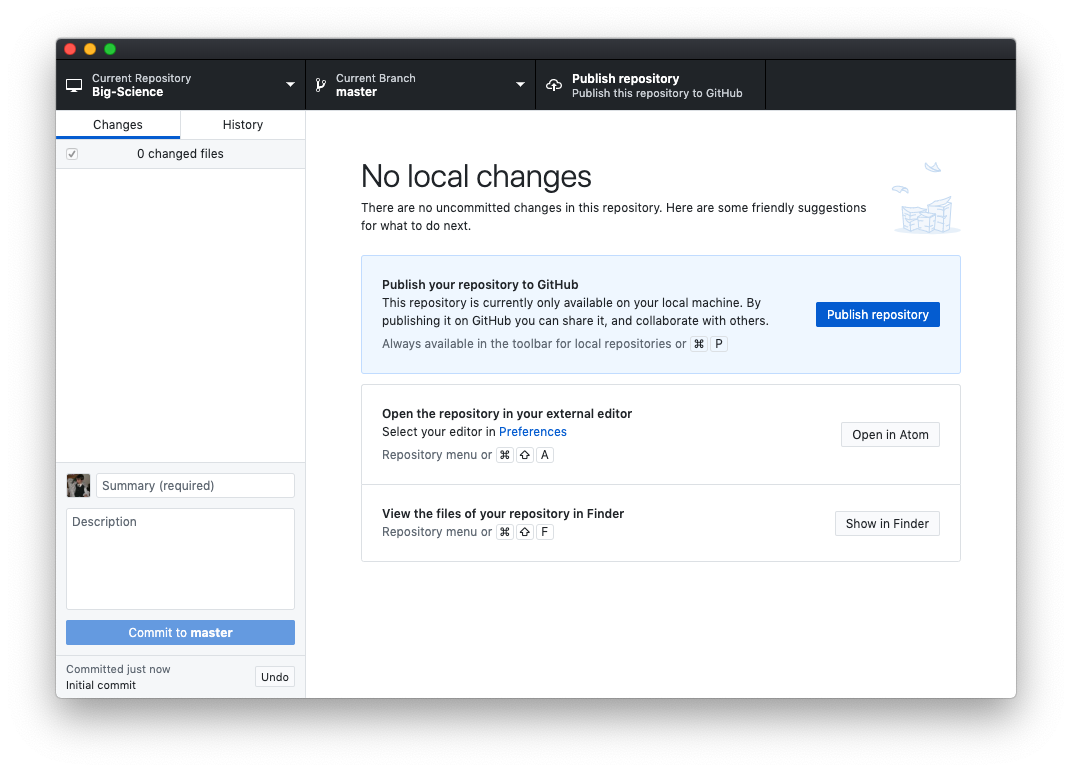
If it does not, then click Current Repository in the upper left corner and ensure that Big-Science is selected.
Next click on either the blue button that says Publish repository or the rightmost button in the top bar of the window with the same text. You will then be presented with the following dialogue:
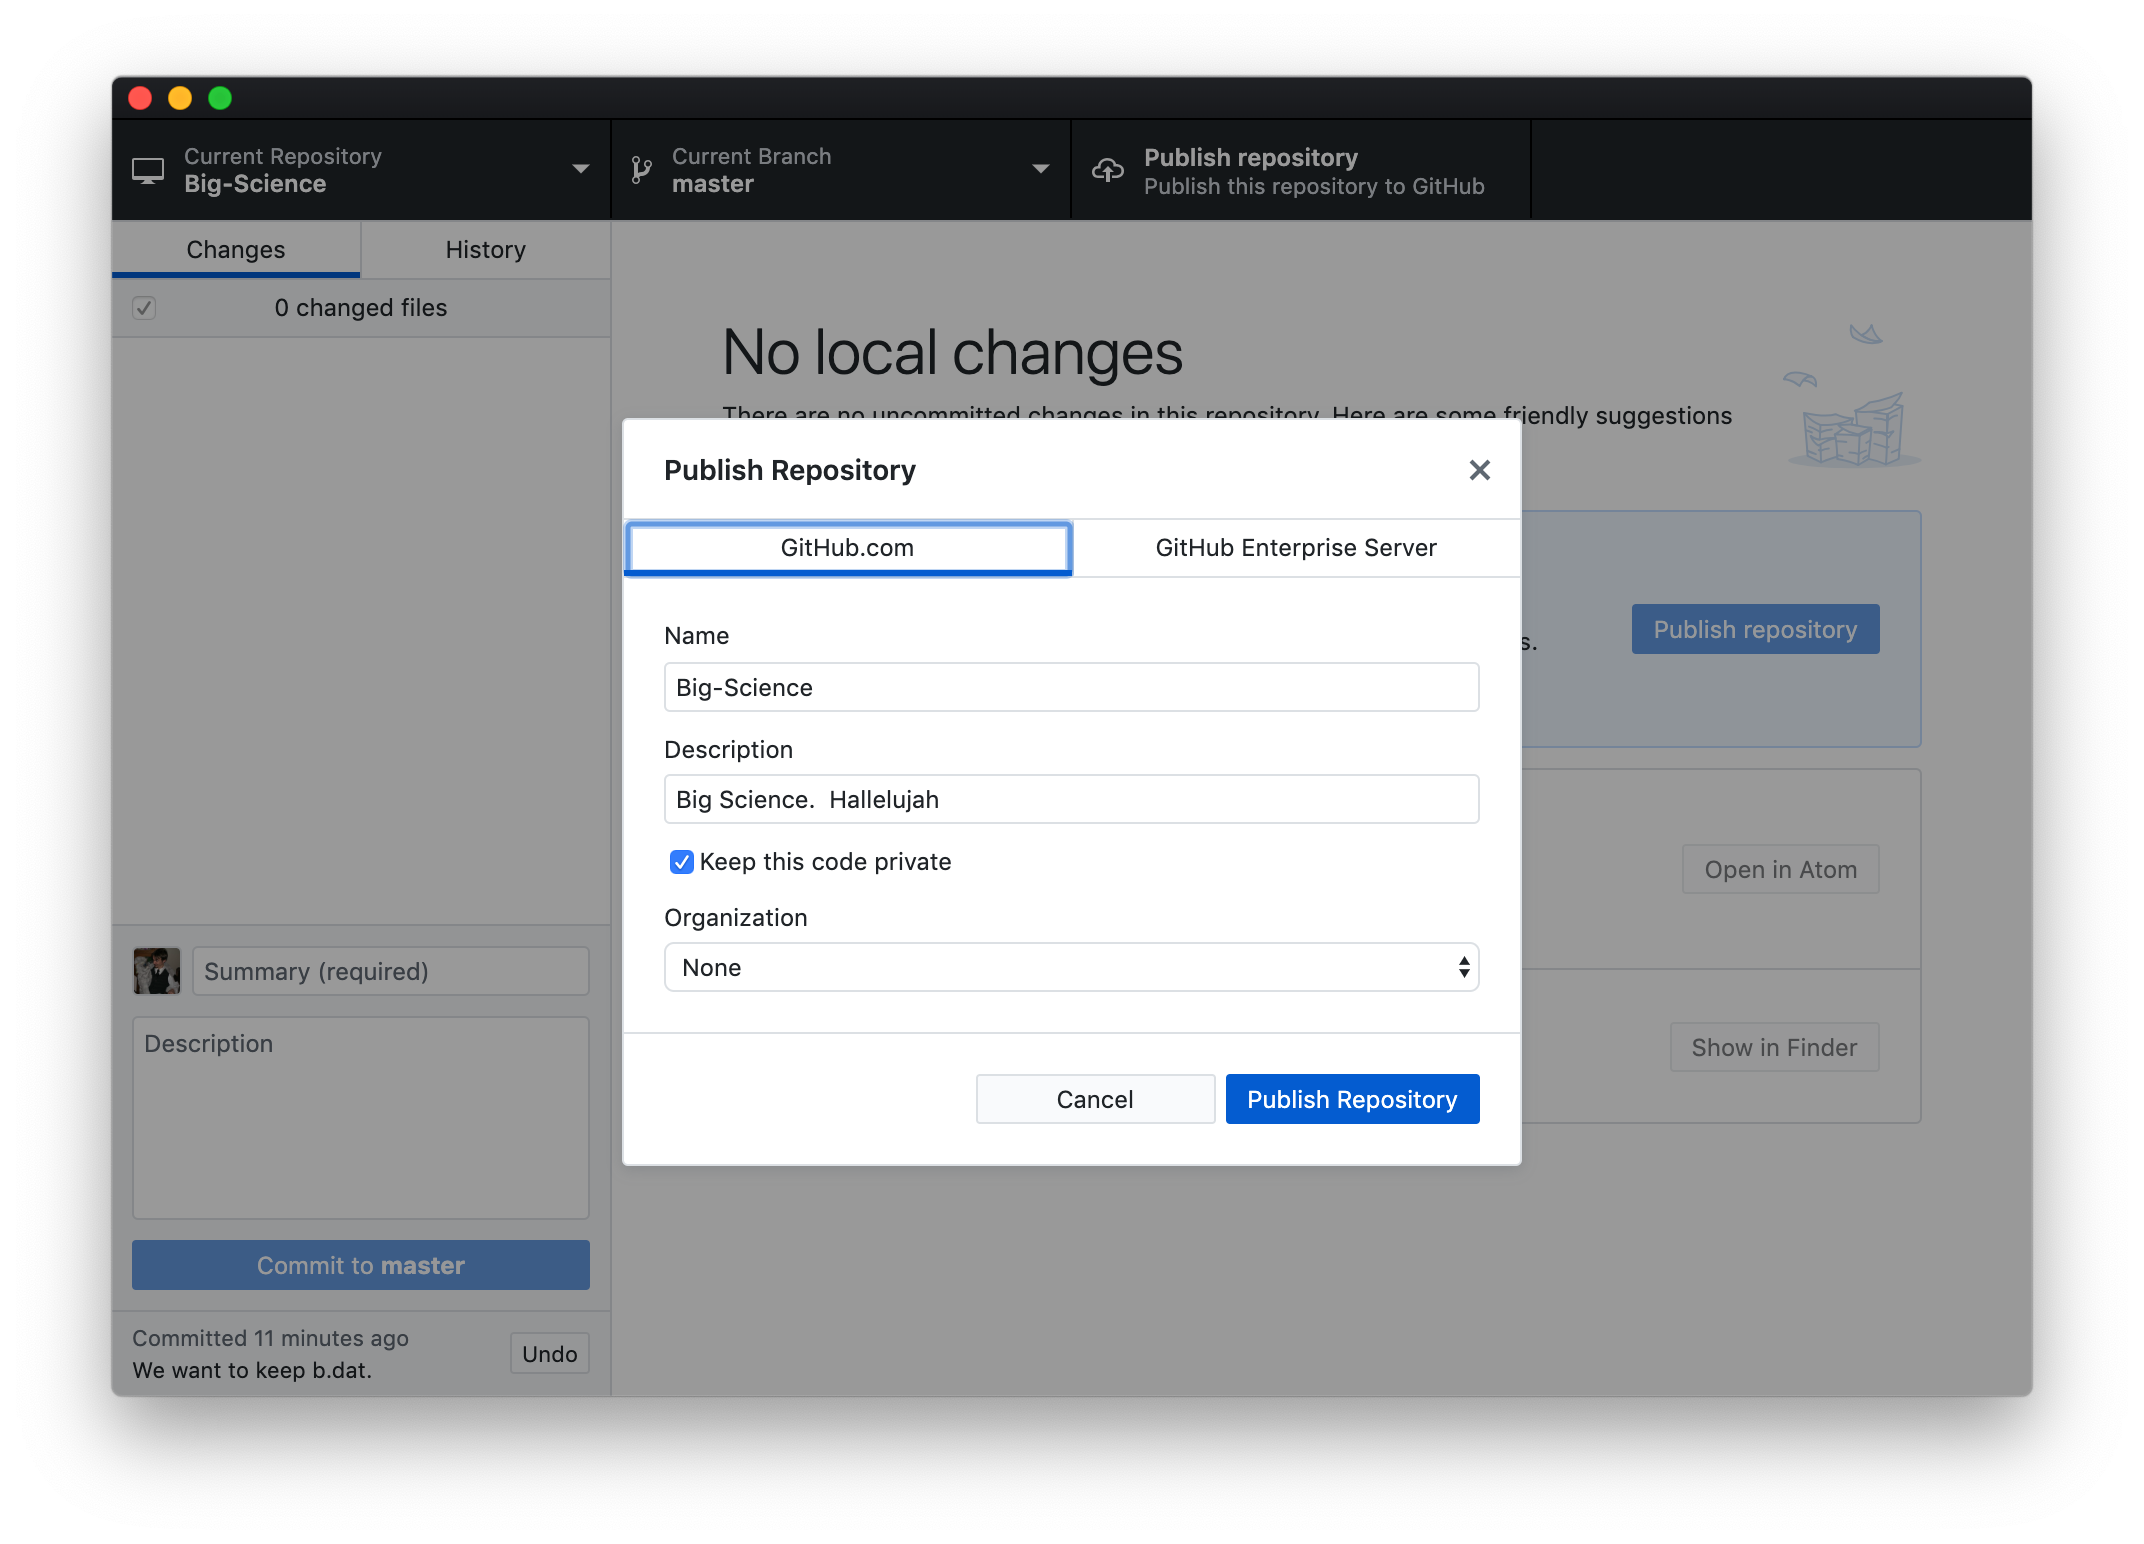
You are given a few options. If you do not want the general public to be able to see the contents of your repository (useful if your results aren’t published yet), click the checkbox next to Keep this code private. If you are part of an Organization in GitHub, you can choose to have your repository belong to the organization’s account rather than your individual user account. Note that the Zuckerman Institute has its own organization here, which can be used to store code snippets and packages created by labs and scientific platforms. The main advantage of using the institutional GitHub is that it may increase the discoverability of your code. If you’re interested in make your code available via the organization, contact Research Computing.
For this example, uncheck Keep this code private and click Publish Repository. Clicking Publish Repository effectively creates a new folder on GitHub’s servers, initializes it with a Git repository, and then copies all the contents from the .git folder on your
laptop to the .git folder on GitHub’s servers. The act of copying all the contents from a local .git folder to a remote repository’s git repository is called pushing in Git terminology.
We can verify that our changes were pushed by navigating to the GitHub website in a web browser, clicking on our user icon in the upper right corner of the page, and then clicking on Your repositories.
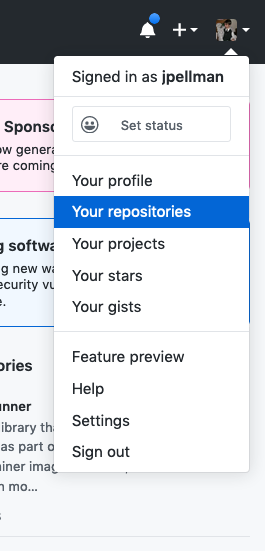
A link to Big-Science should be visible- click on it to continue. Your screen should then look something like the following:
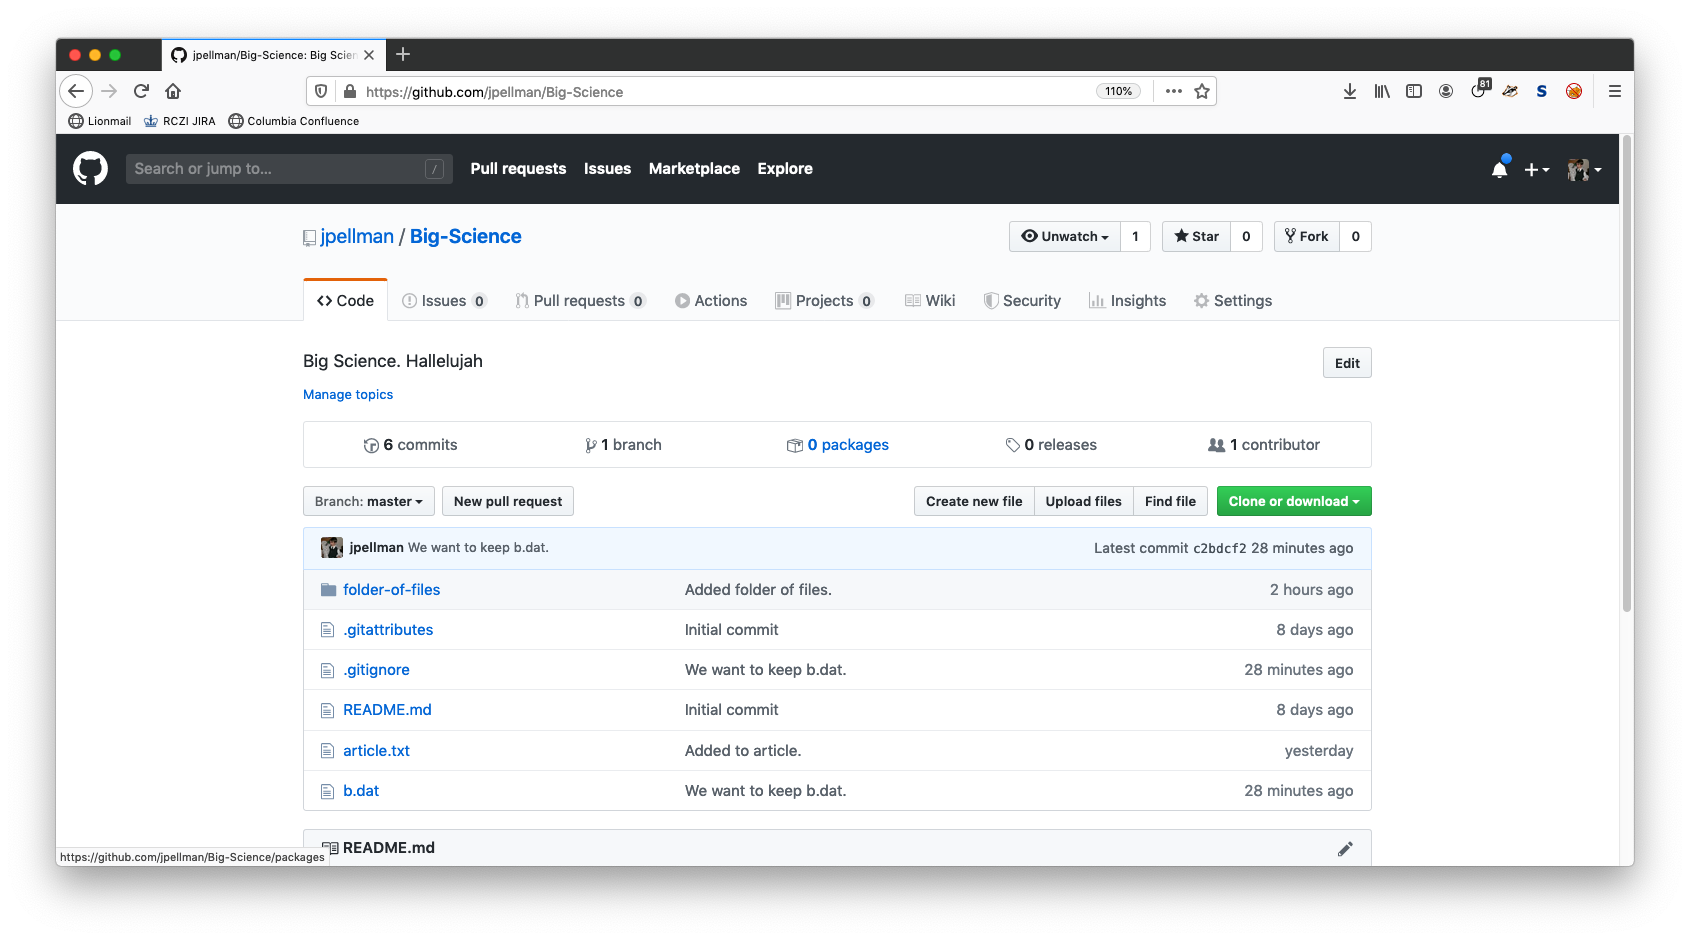
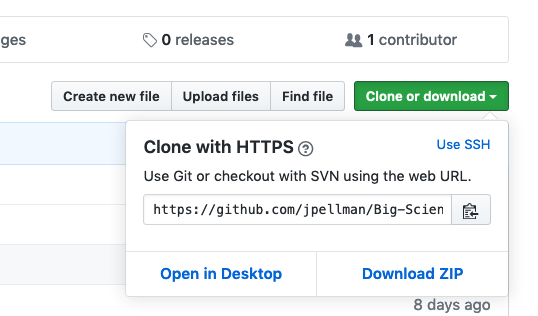
As we can see, the contents of our project have been copied to GitHub’s servers with complete fidelity. If you click on the green Clone or download button, GitHub will give you a URL that indicates the location of the centralized copy of your repository:
HTTPS vs. SSH
You can click on the Use SSH link to change the protocol from HTTPS to SSH. SSH is alternative way to download and upload data, which is a bit more secure.
It is also necessary if you want to secure your account using two-factor authentication Generally, we use HTTPS because it does not require additional configuration. After the workshop you may want to set up SSH access, which is a bit more secure, by following this tutorial from GitHub.
One issue with a remote repository is that you may have uploaded changes from one computer that don’t exist on on another computer where you’d like to work with a local copy of repository. In this situation, the remote repository’s history will have events that haven’t occurred in the local repository’s history- it will be ahead by one or more commits.
Let’s simulate this situation by creating a file that doesn’t exist in our local repository in the remote repository on GitHub.
GitHub allows you to create and upload files directly in
your repository without having to leave the browser.
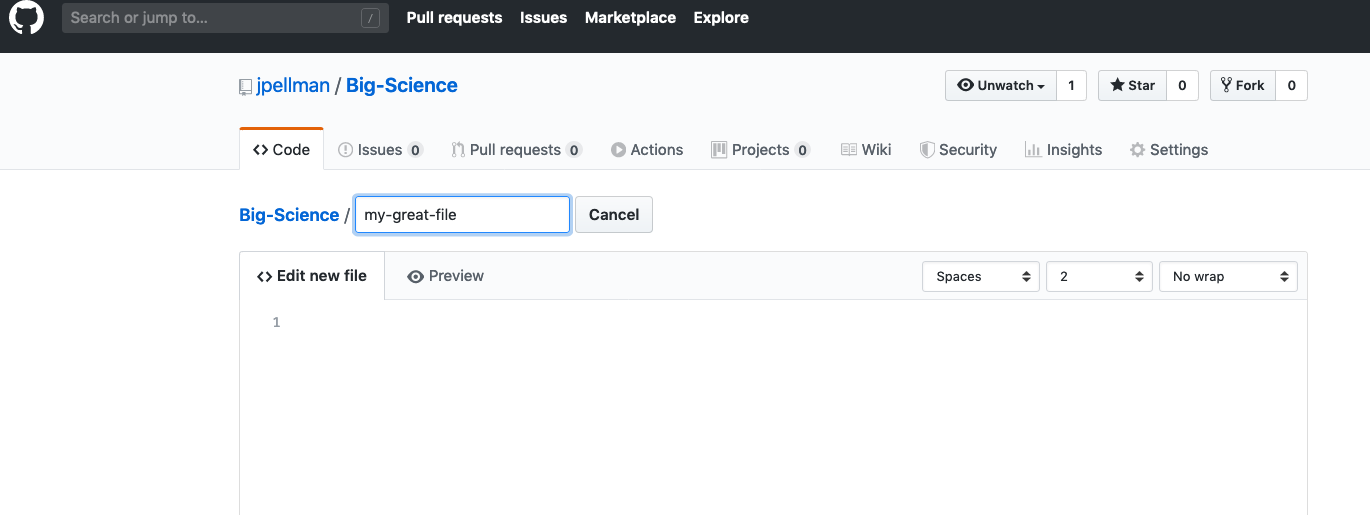
To do so, you can click either the Create new file or Upload files buttons next to
the green Clone or download button (also see here). We’ll create a new file for this tutorial. Name the file my-great-file as follows:
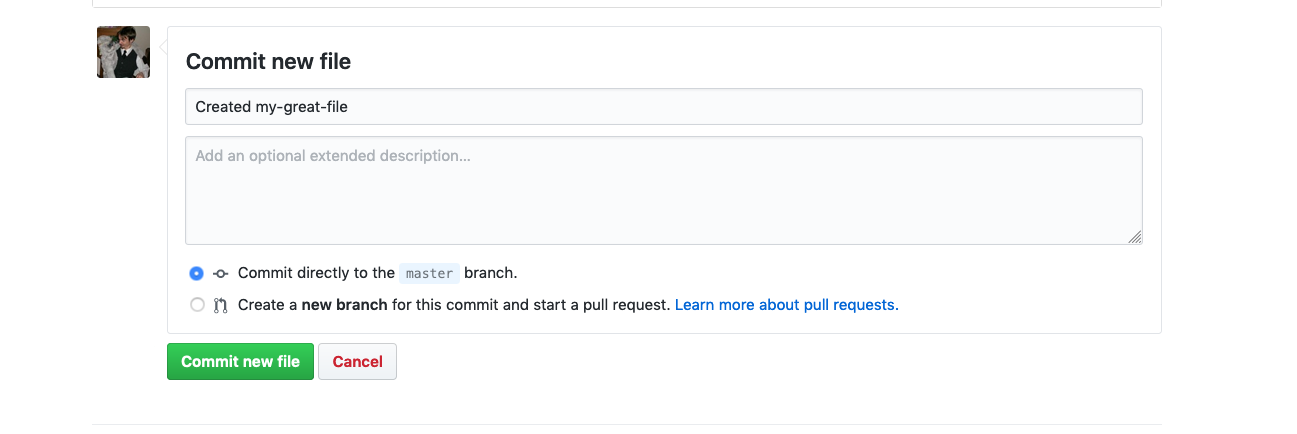
At the bottom of the page, you’ll be given a field where you can enter a commit message. Enter a descriptive message, ensure that Commit directly to the master branch is selected, and then click the green Commit new file button.
The files in your remote should now appear similar to the following:

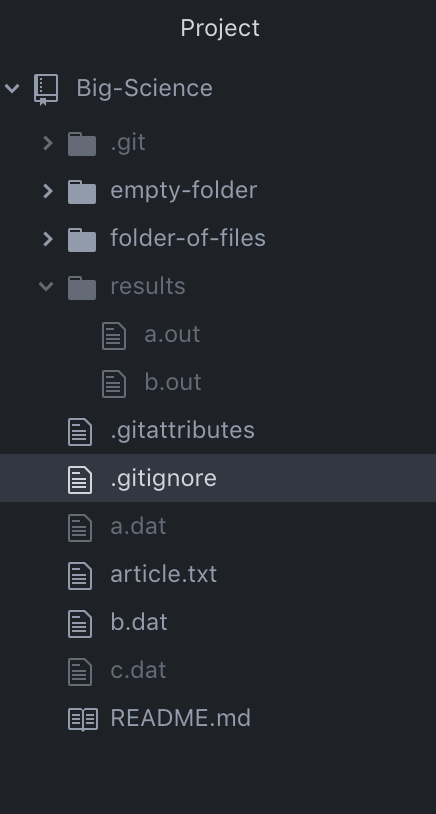
If we switch to Atom, however, we’ll notice that we my-great-file is not available:
Navigate back to GitHub Desktop and click the button labelled Fetch origin. Fetching is the act of downloading summaries of events in the Git history without actually downloading the changes themselves. Since origin is a conventional name that the local repository gives for the remote repository, to “fetch origin” means to download a log of changes that the remote repository (hosted by GitHub in this case) is aware of, but the local repository isn’t. After you’ve fetched origin, your window should appear as follows:
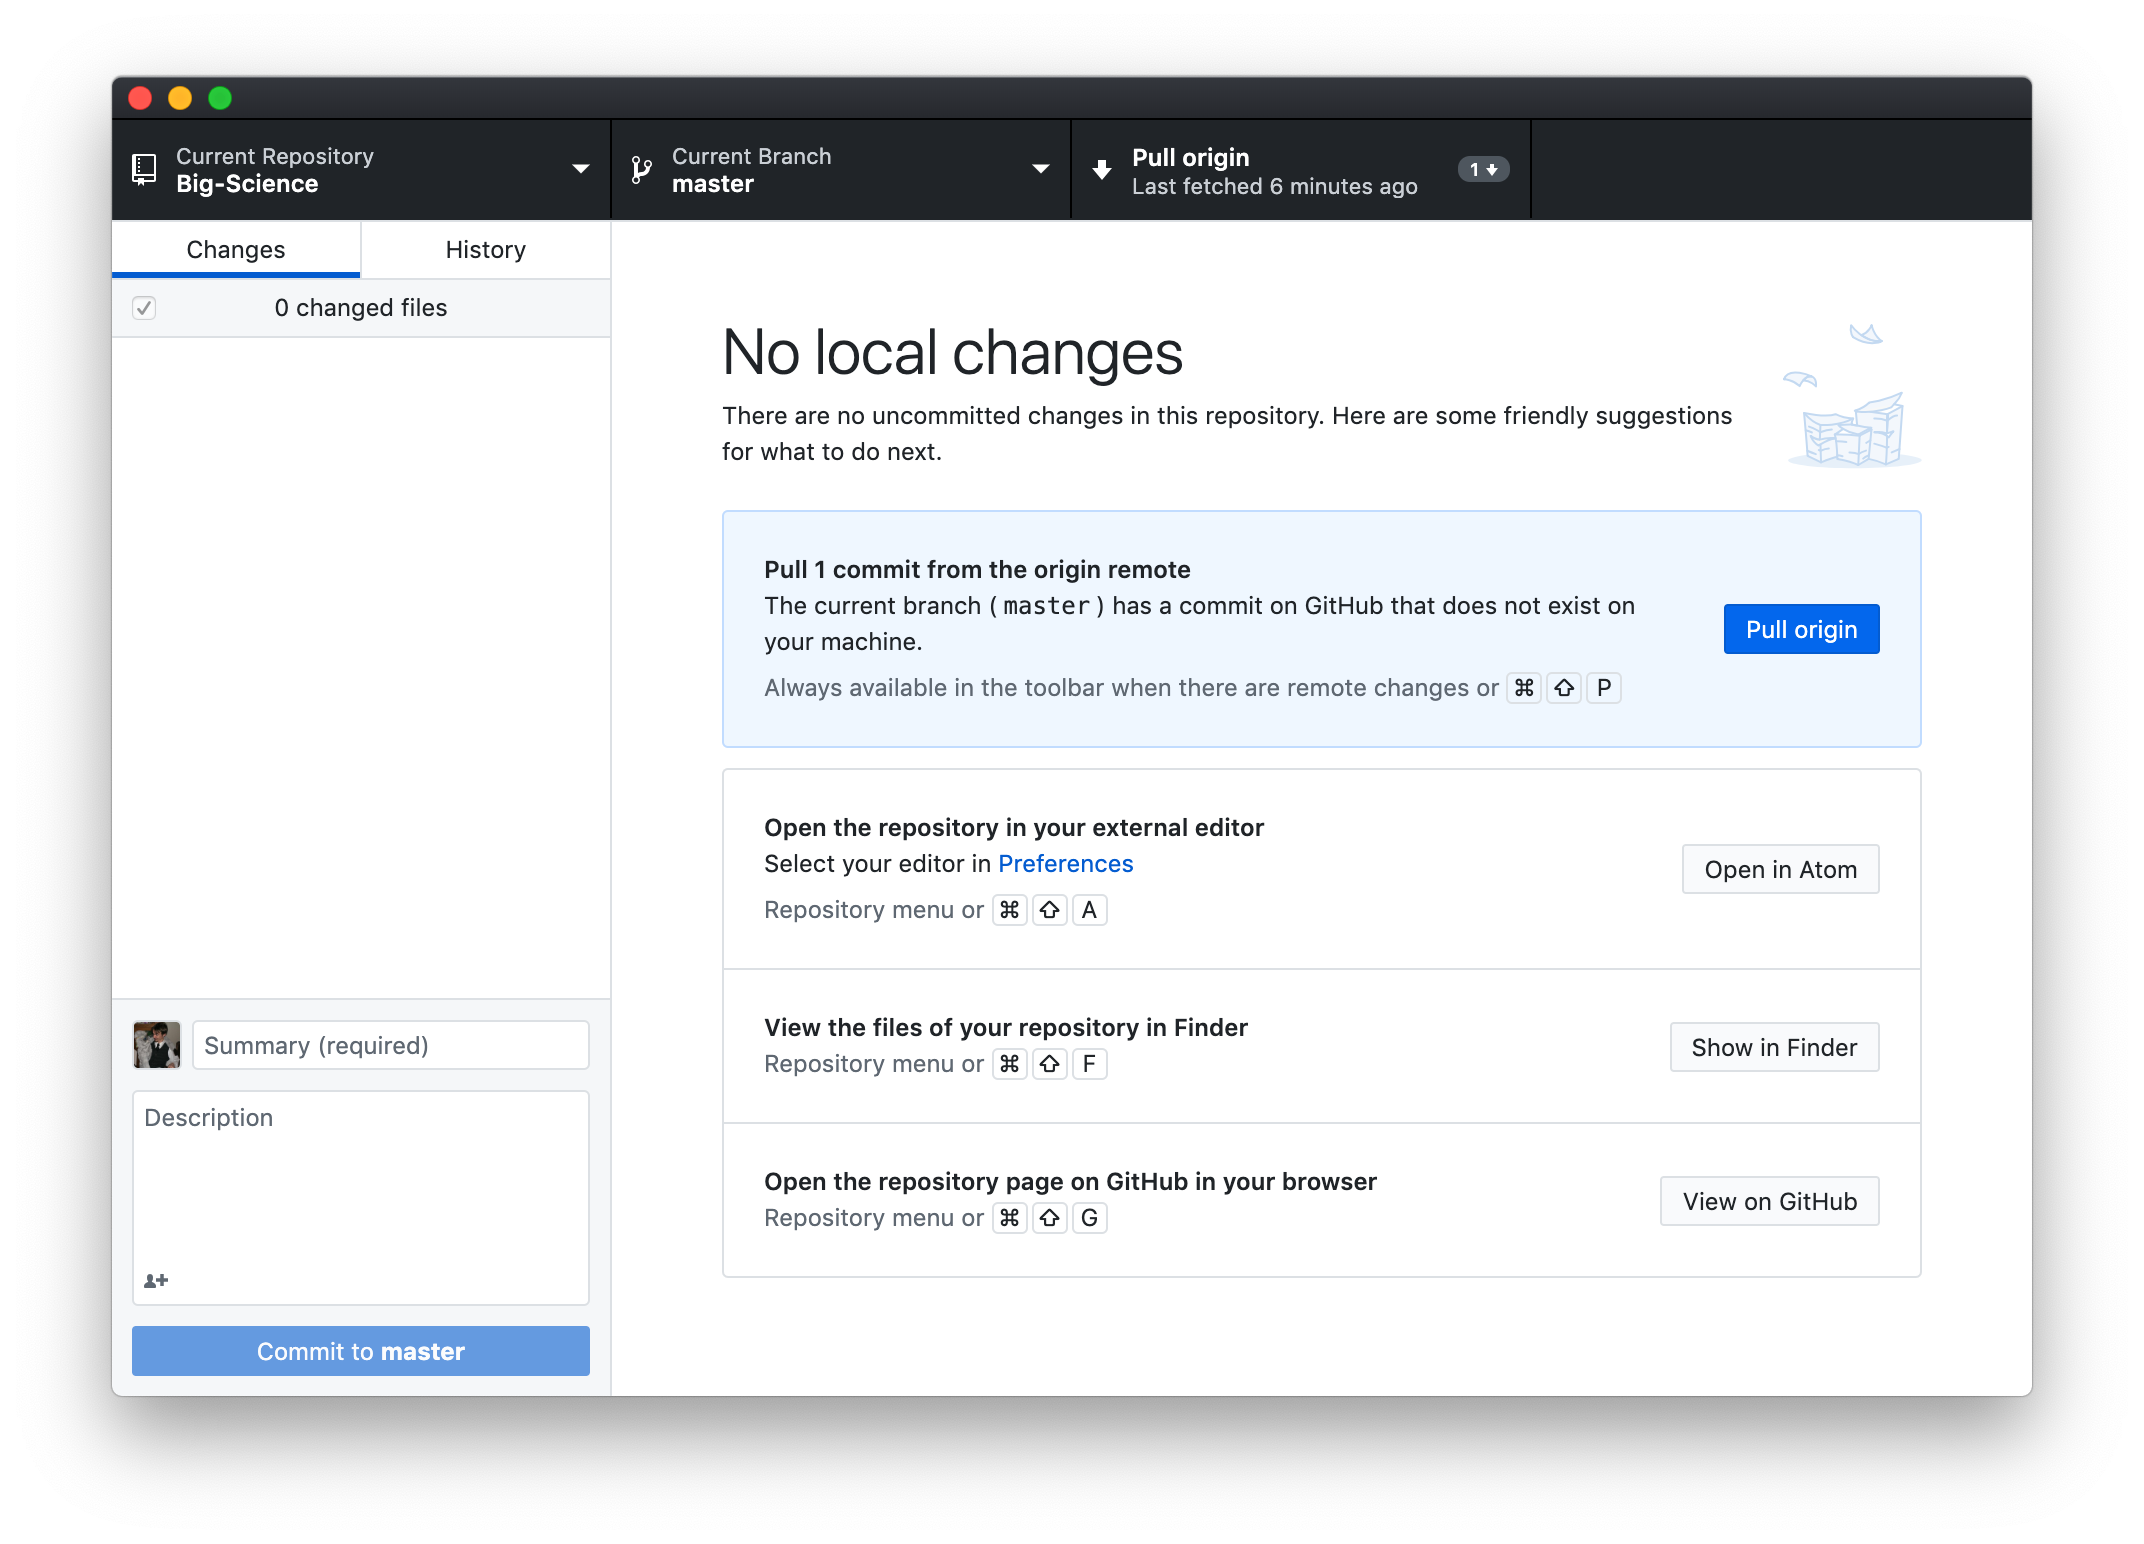
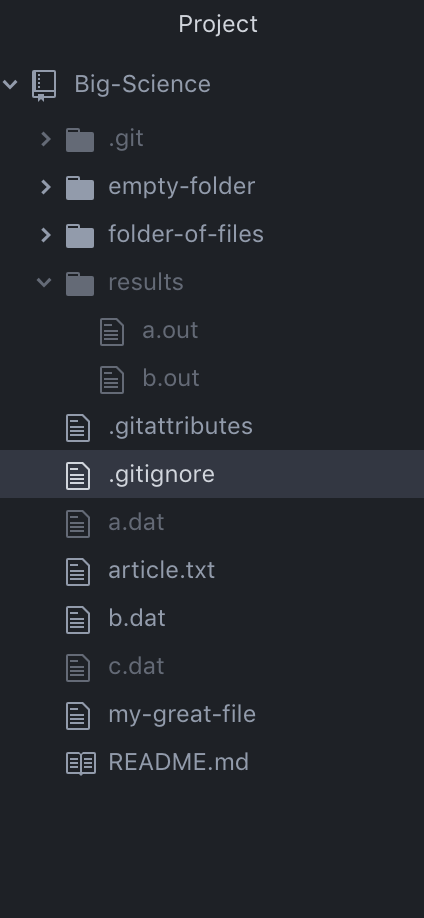
Pulling is the act of downloading the actual changes themselves from a remote repository after you’ve fetched the Git history. If you click the blue Pull origin button, the new file we created will be downloaded. You can verify this in Atom:
Push vs. Commit
In this lesson, we introduced the the concept of pushing. How is pushing different from committing?
Solution
When we push changes, we’re interacting with a remote repository to update it with the changes we’ve made locally (often this corresponds to sharing the changes we’ve made with others). Commit only updates the history log in your local repository.
Key Points
A local Git repository can be connected to one or more remote repositories.
Use the HTTPS protocol to connect to remote repositories until you have learned how to set up SSH.
Pushing copies changes from a local repository to a remote repository.
Fetching checks for changes in the history of a remote repository and copies data about those historical events to a local repository.
Pulling copies file changes from a remote repository to a local repository.